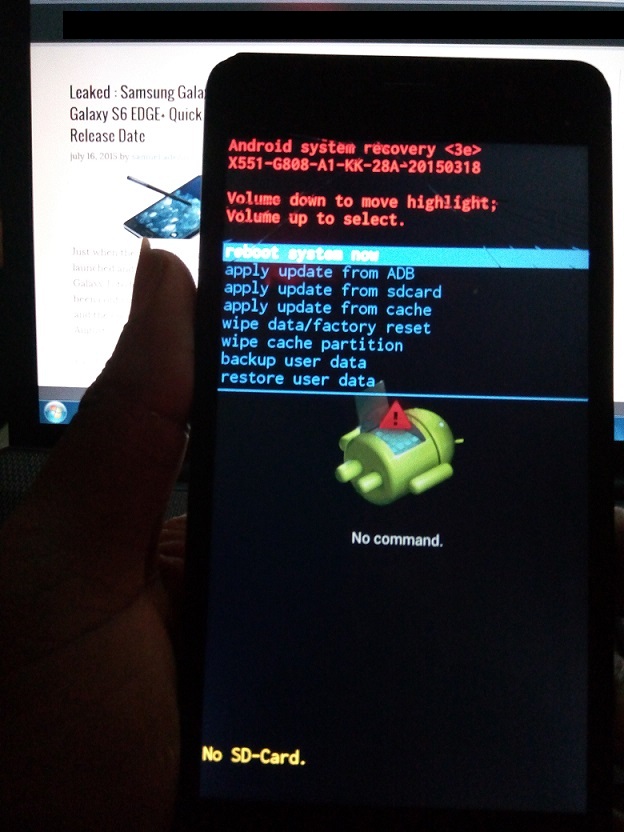
HOW TO CREATE A CWM BACKUP/CWM RECOVERY.IMG FOR ANY MTK PHONE/DEVICES

It’s quite disheartening when I see people complaining of the woes having their phone devices bricked without them having a proper stock rom backup via cwm  recovery or having a clockwork mode recovery backup which could have helped them restore their phones back to the last backup before the phone bricks occurrence.

The main item or ingredient neccessary in having a cwm  backup is to get the particular recovery.img  for the phone type..


mtk1.1.1.png


instead of trying to Google for the compatible recovery image posted by someone else for your phone type,  why not just created the cwm recovery by yourself in a couple of minutes {we all know that flashing the wrong recovery.img of someone else on your phone might have adverse effects on the phone itself…
ONCE AGAIN… it is very important to have your android given permision for root shell which is quite different from the phone being rooted..
To do this in a simple way… Just install BusyBox app on your phone…. Grant it root permission once the app is opened and click on the INSTALL prompt by the left… wait for a while while busybox keeps working on your root shell until you get the INSTALLATION SUCCESSFUL prompt…
Close the app and go to the pc for the final steps.
HERE IS AN EASY GUIDE ON DOING THAT….
**{tools needed}
#**MTK DROID TOOLS version 2.5.3 {preferably}..
#** An adb  driver or pda  driver for your phone..(has to be installed and run so as to make the android and pc communicate with one another)
#** root your phone with kingroot{optional cos it can also be rooted using mtkdroid tools}
#**Install busybox  on the phone so as to have root shell access.

(more…)

how to create mtk flash files using mtk droid tools

For most MTK android devices, flash files are required to correct most software errors especially; those software problems that involve repairing corrupt system files.

Meanwhile, MTK android devices flash files are not readily available therefore; to flash a particular MTK android device, you most likely need to extract complete ROM including system files of another working kind of the same MTK android phone.


Unbricked-infinix-hot-note
 DEFINITION OF TERMS:

1- MTK Androids: MTK android devices are most android devices generally regarded as China androids. Technically speaking, they are those android devices powered by MTK also knows as MediaTEK CPU and chipset.

MTK android devices include;

Tecno androids

Infinix androids

Wiko androids

Gowin androids

Gionee androids

Opsson androids

Most Huawei androids

Some LG androids

Lenovo androids and the likes of them. (more…)

how-to-setup-mtk-droid-tools-on-your pc

DEFINITION OF TERMS:

1- MTK Androids: MTK android devices are most android devices generally regarded as China androids. Technically speaking, they are those android devices powered by MTK also knows as MediaTEK CPU and chipset.

MTK android devices include;

Tecno androids

Infinix androids

Wiko androids

Gowin androids

Gionee androids

Opsson androids

Most Huawei androids

Some LG androids

Lenovo androids and the likes of them.

2- Servicing MTK Androids: this simply involve the maintenance processes of MTK Android devices such as flashing, formatting and other software repairs of MTK android devices.

ISSUE(S) TO BE SOLVED:

1- Where to download MTK Droid Tools.

2- How to Setup MTK Droid Tools on Windows PC. (more…)

flashing mtk android with sp flash tool

Bricked-Infinix-hot-note


Here and there, you may have been hearing about flashing. Flashing is the term used for reverting most phones back to its factory defaults by means of loading its firmware on it.

Flashing is mostly done when a phone has a particular software problem that is not correctable by factory resetting the phone or by any other means.
In this tutorial, I discuss how to flash MTK android devices using SP Flash Tools. In most cases, bricked MTK android devices are the ones that actually require flashing using SP Flash Tools or MTK Android devices with corrupt system files.

DEFINITION OF TERMS:

1- MTK Androids: MTK android devices are most android devices generally regarded as China androids. Technically speaking, they are those android devices powered by MTK which also known as MediaTEK CPU and chip set.

MTK android devices include; (more…)

installing complete mtk android drivers

To carryout any maintenance works on MTK android devices, drivers are needed especially; on Windows PC. Although, there are universal drivers installer like the PDanet+ that automatically installs drivers for virtually all android devices, but it does not contain MTK android devices preloader drivers which is actually the main topic for discussion in this tutorial.

DEFINITION OF TERMS:

1- MTK Androids: MTK android devices are most android devices generally regarded as China androids. Technically speaking, they are those android devices powered by MTK also knows as MediaTEK CPU and chipset.

MTK android devices include;

Tecno androids

Infinix androids

Wiko androids

Gowin androids

Gionee androids

Opsson androids

Most Huawei androids

Some LG androids

Lenovo androids and the likes of them.

2- Servicing MTK Androids: this simply involve the maintenance processes of MTK Android devices such as flashing, formatting and other software repairs of MTK android devices.

3- Preloader: preloader is the first partition on MTK android devices. Being the first partition on MTK android devices, it is from the preloader that MTK android devices actaully boot.

An MTK android device with corrupt Preloader is actually dead and may never work again -this is why care must be taken when flashing MTK androids.

4- Drivers: drivers are the files that serve as intermediary between the hardware of your phones and your PC. Drivers aid the interaction and communication between your phone and PC.

ISSUE(S) TO BE SOLVED:

1- How to Download Complete Windows PC Drivers for MTK Androids.

2- MTK Android USB VCOM Installation Guides for Both Windows 64bit and 32bit PC.

SOLUTIONS:

1- Download USB VCOM drivers from any of the mirrored link below.

2- This tutorial contains a concise illustration on how to setup MTK Droid Tools on your Windows PC.

SOLUTION 1: USB VCOM Mirrored Download Links for MTK Androids

Mediafire Link: MTK Android USB VCOM Download Link

Box Link: MTK Android USB VCOM Download Link

SOLUTION 2: MTK USB VCOM Installation Guides for Windows PC

i- The USB VCOM is packed in a zip folder. Download it from the link above and extract it on a folder on your PC. See the image below.

ii- Locate the USB VCOM Installer from the folder as seen in the image below and double-click the AutoRun_Install app.


NOTE:

i- During the installation, Windows may warn you several times of the drivers signature. Simply click “Install Drivers Anyway” to continues. See the image below.

ii- You may have to download other ADB drivers to complement the USB VCOM, to make your MTK Android drivers a whole. I recommend PDanet+ for that.

Once the installation is complete, simply click “Finish“. You may now connect any MTK android device to the PC.
how to flash custom roms on mtk devices without pc

Flashing custom recovery on android devices could help prevent so many disasters especially; on MTK android devices like Tecno, iTel, Infinix and other MTK android devices generally referred to as China androids (at least, by Nigerians). No offence!

Here, I would discuss how to flash a custom recovery on most MTK android devices like Tecno, Infinix, iTel and others using Mobile Uncle application.

Mobile Uncle is a very useful diagnonistic application for most android devices, especially; most MTK android devices. It has a lot of features and can be used to modify MTK android systems, however; most of its functions requires root previlege.

Flashing Custom Recovery On MTK Androids Using Mobile Uncle

1- Download MobileUncle application from GooglePlay store or from anywhere else if you do not already have it installed on your phone.

2- Root your phone if it is not rooted yet. Follow the


guides here to root all MTK android devices.

3- Download the recovery image for your android device.

Please note that the recovery.img has to be for the specific phone.

4- Put the recovery.img you downloaded in the root of the SD Card.

5- Open Mobile Uncle application, scroll to the recovery tab of the application and click it.

6- Wait few seconds for the application to load the recovery.img files on the phone then; select the specific one you downloaded for the phone. A WARNING will pop up, simply click to proceed and wait for the process to complete.

7- Now, reboot the phone to recovery to confirm the process.

Recovery Flashing SAFETY TIPS

It is a good practise to backup your MTK Android stock RECOVERY before you flash any custom recovery on it. You can backup your stock recovery following these guides.


How to Root Android Devices without PC

Android devices are so enjoyable to use, but it can be even more enjoyable if it is rooted. There are so many ways and methods you can use to gain root privilege on your android devices however, not most methods work without the use of your PC.
Here, we discuss how to root your android devices without the use of your PC. This involves the use of just Baidu Root app.

What is Referred to As Android Root

In case you do not know, Android Root, contains some special folders and files in android systems. Meanwhile, gaining access to the Android Root gives you special privileges and rights to perform certain advanced activities on the phone.

How to Root Android Device without PC Using Baidu Root

Baidu Root is an application that can single-handedly root most android devices and it is downloadable from the Google PlayStore.

Follow the guides below to root your android device without PC but JUST Baidu Root app.

1- Download Baidu Root from the link here. Or, from Google PlayStore.

2- Install the Baidu Root application on your phone.

3- Open the application and click on the “A Key to Get Root Privileges” line.

4- Wait for the application to complete the process and give you the confirmation message.

That simple! Your android device has just been rooted.

NOTE

Please note that you need to download any root manager like the SuperSU or SuperUser from the playstore -this is to help you manage and maintain your root permissions.

For any comments or questions over this article please, use the comment box bellow or contact us. And if your questions is not about this article and needs our help over something related, Find Us on Facebook. Got any other info you want us discuss? Share it with us using the comment box or contact us!


android recovery partition

What Is (Android) Recovery

The partition that can be considered as an alternative boot partition that can let any android device boot into a recovery console for performing advanced recovery and maintenance operations on the android device is called The Recovery.

Types of Recovery

Unlike the other platforms, android is an open source, and so, the recovery source codes are available and for these reasons; developing or modifying these source codes is made much more easier than usual.
As a result, there are two types of recoveries; the Stock Recovery and the Custom Recovery.

Stock Recovery
The stock recovery is the built-in partition that contains the recovery console through which the recoverying, updating and maintenance of the android devices are being done.

The stock recovery is a very useful partition but has limited funtionalities as could be compared to the custom recovery. This is however by the design of the stock recovery.

Custom Recovery
In android, the custom recovery is the modified version of the recovery partition made by some thinkers. These custom recoveries could replace the stock recovery and so, could be used instaed of the stock recovery.

Most custom recoveries feature much more funtionalities as could be compared to the stock recoveries. For example; using custom recoveries, you could backup your entire android device contents, select some files or folders to be wiped so you don’t have to wipe everything, install some mods and unsigned version of ROMs and much more.

Clockwork, Amon Ra, TeamWin amongst others are common examples of custom recovery.

If you have questions to ask, comments to make or opinions to add, simply use the comment box below.

Share And Interact Using the Buttons Above

(more…)

[TUT]MTK Android (Sp flash tool ) tutorial

What’s needed:

  • USB data cable
  • MediaTek USB VCOM drivers
  • SP Flash Tool ( Latest version MTK Flash Tool v. 5.1343.01 (18.10.2013))


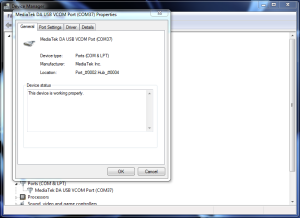
  • First of all, make sure that you have MediaTek DA USB VCOM drivers installed.

MTK Android Flashtool Drivers

Flashing the whole ROM

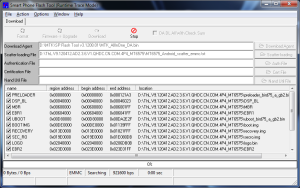
  • First of all open SP Flash Tool, then click Scatter-loading button to load the correct scatter file
    (MT6575_Android_scatter_emmc.txt or MT6577_Android_scatter_emmc.txt, depending on which phone you have) for your device and ignore any message that may appear.

MTK Android Flashtool

  • Turn off your phone, remove the battery and replace it after some seconds (and don’t turn on the phone).
  • Press F9 (or hit Download button) and connect your phone into the computer via USB data cable.
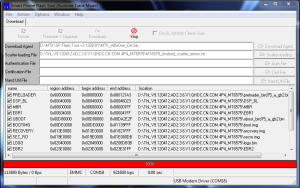
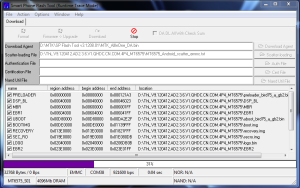
    The process will start and a red progress bar will appear.

MTK Android Flashtool Connect to Computer

MTK Android Flashtool Connect to Computer

  • After the red progress bar is complete, there will appear a purple progress bar.

MTK Android Flashtool runtime trace mode

  • Right after the purple progress bar is complete, a message will appear underneath it:
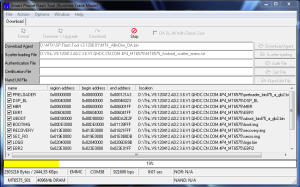
    Please insert USB cable in x seconds” and then the download will start right away (you will see the yellow progress bar filling up).

MTK Android Flashtool runtime trace mode

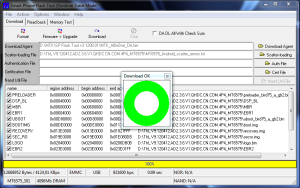
  • When the yellow bar is complete, you’ll get a popup with a green circle and Download OK message,
    which means that the process has been successfully terminated.

MTK Android flashtool Download

  • You can now safely disconnect your phone and turn it on. The process ends here.

Flashing only part of the ROM

  • In case you want to flash just one part of the ROM, that is also possible. In the shown example, only recovery image will be flashed.
    Deselect all parts except the one(s) you want to flash and then press F9 (or hit Download button).

MTK Android Flashtool

  • The tool will immediately show a warning because not all parts are selected, but you should continue anyway. Safely press Yes to continue.

MTK Android Flashtool

  • The download of the chosen partition image will start and after the yellow bar is complete, the popup with the green circle should appear.

MTK Android Flashtool

MTK Android Flashtool

  • Please note that, even though it isn’t mandatory to select it on the list of images to flash,
    preloader file must be present in the same folder as the other partition(s) that you want to flash, or else phone will not be able to enter into download mode.

Attention: Please follow the instructions carefully. I will not take any responsibility on whatever may happen with your phone.

Very important warning: Always make sure that you trust the sources of the ROM you download and know that it is meant for your phone.
After flashing a wrong preloader, your phone will be completely dead (can’t be powered on, it will not charge and won’t be detected anymore by the computer) and there is no way to recover it.

[Tool]SP FlashTool ||MTK Android FLASHER
http://forum.xda-developers.com/show….php?t=1982576
======================
Mediatek – Flash Tool – Info page
Mediatek – Flash Tool – Downlaod page

SP Flash Tool v. 3.1224.0212 (01.11.2013)

MTK Flash Tool v. 5.1320.00 (23.05.2013)
MTK Flash Tool v. 5.1343.01 (18.10.2013)

SP Flash Tool are for SmartPhone products
MT6573\72 Innovative Platform for Mainstream Smartphones
MT6575 Dual-SIM smartphone platform for the mainstream market
MT6577 1 GHz Dual-Core Smartphone Platform
MT6582 Quad-Core Cortex-A7 1.2GHz+CPU Smartphone Platform
MT6589 Quad-Core Cortex-A7 1GHz+CPU Smartphone Platform

MTK Flash Tool is for Feature Phone chips
MT6223 GSM/GPRS solution for ULC/ULC+ market
MT6235 GSM/GPRS/EDGE solution for Mainstream Multimedia
MT6236 GSM/GPRS/EDGE Feature- rich Multimedia solution
MT6238 GSM/GPRS/EDGE Premium Multimedia solution
MT6239 GSM/GPRS/EDGE Premium Multimedia solution
MT6250 Single- Chip GSM/GPRS/EDGE- RX entry- multimedia solution
MT6252 GSM/GPRS/EGPRS entry- multimedia single chip solution
MT6253 Single- Chip GSM/GPRS entry- multimedia solution
MT6255 Single- Chip GSM/GPRS/EDGE- RX Smart Feature Phone solution
MT6268 High- end EDGE/GPRS/WCDMA Feature Rich Multimedia Phone Solution
MT6276M HSPA Data Modem Solution
MT6516 EDGE/GPRS Feature Rich Multimedia Smart Phone Entry Solution

MTK Flash tool v. 5.x fix a critical bug about SP Flash Tool 3.x where the SP Flashtool reads iincorrectly the scatter file of some new mobile based on MTK6582 (error: recovery partition is not flashable).


STOCK ROM Lollipop 5.1.1 X510-D5110-L–20150805 FOR INFINIX HOT2 ANDROID ONE.

attacment.php


Many people have been asking about aa stock Rom for X510 infinix hot2
And some have even bricked the phone or having problems with OTA install
This will be very helpful….

Requirements:

If you want to flash custom recovery for infinix hot 2
Please Click herek
Before I proceed further, the first thing you must do
Is to back up your present Rom (100%) with Droid tool
And SP FLASH TOOL if you haven’t bricked the phone yet.

THIS ROM CAN ONLY BE INSTALLED WITH SP FLASH TOOL

HOW TO INSTALL
First, you need a PC, Mediatek VCOM USB Drivers and SP Flash tool
Do a backup incase things go wrong

  • Download the stock Rom and extract the zip
  • Open the folder and check for MT6580_Android_scatter.txt (Infinix ROM scatter file has 23 partitions while Android one scatter file has 28 partitions, open with text editor and confirm before flashing)
  • Open SP FLASH TOOL as administrator
  • Click on scatter loading and load the scatter file above
  • Select download and choose sub options of download only or firmware upgrade from
    The drop down option under the download had these following options:
    Download only: use this option when you are flashing the same type of ROM that is in your phone. Use this option for also flashing recovery or if you want to flash select partitions only
    Firmware upgrade: Use this option when you are about to a different ROM from the one in your phone e.g. if you’re using Android one ROM and want to flash infinix ROM or vise versa. Note; to use firmware upgrade option, every partition must be selected. You can also use this option on partially bricked phones.
    Format All and download: this option should only be used for fully bricked phones
  • Click on the download icon when you are ready
  • Power down your phone, connect quality usb chord to your phone first. Keep
    The phone in a place where it won’t shake. Connect it to your PC. If you correctly
    INSTALLED Mediatek VCOM USB DRIVERS it will detect and install the ROM.

Developers needed

Developers are also needed to help out as all my efforts to port custom recovery
Have proved abortive as it seems that the recovery image is protected. I’ve attached all the image in the ROM so please use the image to see if you can unpack them and create a custom recovery at least.

ABOUT THE ROM
Please make sure that your phone model is X510 to avoid bricking your phone
The infinix Rom is more of AOSP than pure Google that came with my X510
It has more features than the out of Box Rom that came with my phone.
“Ok Google” doesn’t work from from the home screen you have to tap the search
Bar and say OK Google.
It has better battery optimisation about 30-40%
It can work for any most African regions and beyond.
I’ve also added the Android one stock firmware in incase you want to go back to out of the box Google stock Android one firmware. This is necessary because it’s from this stock firmware that you can update to Marshmallow 6.0 once the roll out starts for 2nd generation Android one phones

Credits:
Infinixmobility
@DR_MOOSAVI for SP FLASH TOOL Tutorial
Ahmed ElShaer for uploading the stock rom (all credit for the rom to him)

Attached Thumbnails

Click image for larger version

Name:	IMG_20150916_163415.jpg
Views:	4884
Size:	236.5 KB
ID:	3475783   Click image for larger version

Name:	IMG_20150916_163351.jpg
Views:	4676
Size:	220.2 KB
ID:	3475784   Click image for larger version

Name:	IMG_20150916_163336.jpg
Views:	4418
Size:	241.6 KB
ID:	3475785   Click image for larger version

Name:	IMG_20150916_163316.jpg
Views:	4172
Size:	233.9 KB
ID:	3475786   Click image for larger version

Name:	IMG_20150916_163304.jpg
Views:	4434
Size:	218.0 KB
ID:	3475787   Click image for larger version

Name:	IMG_20150916_163244.jpg
Views:	4252
Size:	219.7 KB
ID:	3475788   Click image for larger version

Name:	IMG_20150916_155357.jpg
Views:	4254
Size:	251.7 KB
ID:	3475789   Click image for larger version

Name:	IMG_20150916_155247.jpg
Views:	4020
Size:	231.1 KB
ID:	3475790

Attached Files

File Type: img recovery.img[Click for QR Code] (7.49 MB, 2336 views)
File Type: img recovery-verified.img[Click for QR Code] (7.49 MB, 1314 views)
File Type: img boot.img[Click for QR Code] (6.67 MB, 1096 views)
File Type: img boot-verified.img[Click for QR Code] (6.67 MB, 944 views)
File Type: txt MT6580_Android_scatter.txt[Click for QR Code] (8.5 KB, 3816 views)
File Type: txt ota_scatter.txt[Click for QR Code] (399 Bytes, 1004 views)
File Type: img secro-verified.img[Click for QR Code] (132.3 KB, 536 views)
File Type: img secro.img[Click for QR Code] (132.0 KB, 512 views)
File Type: img ramdisk.img[Click for QR Code] (822.8 KB, 614 views)
File Type: img ramdisk-recovery.img[Click for QR Code] (1.62 MB, 724 views)
File Type: zip MediaTek USB VCOM drivers.zip[Click for QR Code] (6.16 MB, 8370 views)